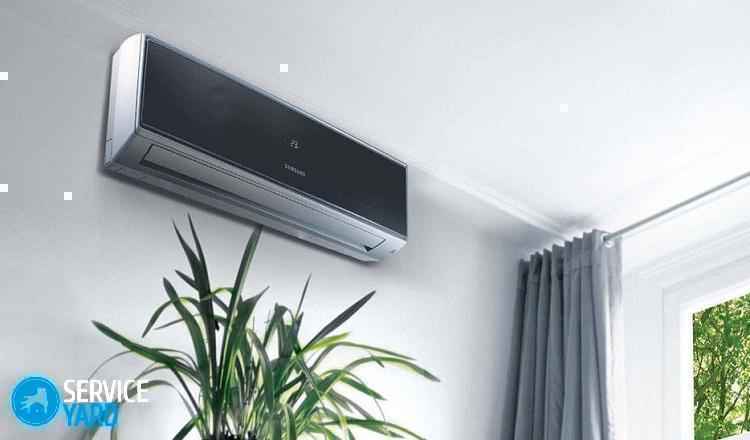
Analysis of lg air conditioner. How to remove the front cover of the air conditioner. How to disassemble a wall-mounted air conditioner. What should be done
There is a lot of information, articles and videos on this issue on the Internet; we will try to summarize with you a little and look from the technical side at the process of cleaning and servicing a split system (air conditioner) both with our own hands and when calling specialists.
To begin with, I would like to answer a question that worries everyone and everything.
How often should you clean your air conditioner? There is no definite answer; it depends on the operating conditions and habitat. Air conditioning in an apartment is one thing, and air conditioning in a Bar, Cafe or Food Unit is another thing. Let's assume that we have an ordinary household air conditioner in an apartment, with a standard power of 7-12 kbti.
We answer: The air conditioner needs to be cleaned and maintained annually!
What is proper air conditioner cleaning?
The second question is what is meant by cleaning the split system (air conditioner). Cleaning the filters of the indoor unit can also be called cleaning, but such “cleaning” is of little use. Cleaning an air conditioner (split system) is, first of all, cleaning the heat exchangers (evaporator and condenser) of the indoor and outdoor units, cleaning the fan, cleaning the squirrel wheel, cleaning the drainage system.
How to properly clean split system filters?
Cleaning split system filters should be taken by default; filters must be cleaned every two to three weeks. This sweet girl will show you how to do it correctly.
Well, how to clean the split so that it can be of real use?
Without steam cleaner and washer high pressure This is difficult to do, but you can get by with improvised means; it is advisable to do such cleaning before each summer season.
How to disassemble and clean your home air conditioner yourself
I found it very good video On the Internet, how to properly clean the indoor unit of a split system yourself, look:
What is the difference between cleaning and servicing an air conditioner (split)?
Maintenance is carried out by specialists using a steam cleaner and washing, which in principle you can do yourself, but the key difference between maintenance and cleaning of the split system is that specialists measure the freon pressure in the system and, if necessary, refuel required quantity freon so that the split cools at an acceptable level. Diagnostics of electrical and installation connections is carried out automatically. In other words, cleaning the split system is part of the work on servicing air conditioners. I found a decent video, good guys, they explain everything in detail, watch it:
After watching these videos and reading the article, I think you all have become a little clearer about what kind of animal “cleaning air conditioners” is and “what they eat it with.” And you will decide what to do, clean your split yourself, or call specialists. But I would like to summarize all of the above:
1) You can clean the air conditioner filters yourself every 2-3 weeks
2) Cleaning of the indoor unit (condenser, squirrel wheel, drainage) must be carried out monthly on your own or by calling specialists
3) Maintenance(comprehensive cleaning of the internal and external units, refilling with freon) must be carried out once every two to three years calling the specialists
Numbers and prices
The average cost of cleaning a split system in Krasnodar is 1300-1500 rubles per season. This includes cleaning the indoor and outdoor units of the air conditioner, with disassembly. With a steam cleaner and a sink, sometimes just with a steam cleaner. In good services, during the high season there is usually a queue of at least 2-3 days. There may be more, but depending on your luck.
The annual loss of freon (microcracks and microleaks) set by the manufacturer is 5-7%.
Refilling with freon, if necessary, is not included in the cost of cleaning, and can cost 500-1000 rubles additionally, depending on the amount of freon.
how to remove the casing from a samsung air conditioner | Topic author: Vladislav
how to open the air conditioner to get to the fan I found the bottom 2 screws, what needs to be done to open
Vadim Unscrew two or three screws under the horizontal blind.
Then carefully move the bottom of the body aside. Try to ensure that the blinds fit through the slot. There are three hooks on the top that will unhook themselves. After removing the case, carefully remove the thermal resistor from the slot.
Then, on the left side, unscrew one screw holding the drainage tray, carefully slide it off the hooks and let it hang on the drainage hose.
The fan will be freely accessible.
Be careful when assembling. Don't break the hooks.
Nikita hits the floor with all his might
Victoria Download the instructions for it - there's a breakdown in pictures. At least that's how it works on my HITACHI.
Yuri It is removed from the case. very tight.
Tags: How to remove the cover of the internal unit of a Samsung air conditioner
Disassembling and cleaning the indoor unit of the Panasonic P.S. split system. Don't forget to lubricate the impeller bearing...
Servicing the indoor unit of the air conditioner…
Hi all! At the request of my friends and accomplices in general, I want to write a post about the service of air conditioners, because this is already relevant at the moment (I hope the moderators will be understanding)! The fact is that consumers are often misled by offering them service maintenance air conditioning every year!!! This does not need to be done, because everything depends on the degree of pollution of the room itself where the air conditioner is located!
How to understand that cleaning is already inevitable? Let's take a look at the process of cleaning the indoor unit, perhaps you can perform this operation yourself:
So we have a regular internal block:
Below, so as not to stain the repair, we glue the film onto ordinary masking tape:

Open the lid, remove the mesh filters and rinse them under running water (this can be done at any frequency, but at least once every 2 months!)

Now let's remove it completely top part housing, along with the lid...

We unfasten the bathtub (through it the condensate enters the street)…

and then enjoy the terrible spectacle! Here we can already understand what we breathe including a clogged air conditioner...

We turn on the remote control to 22-25 degrees (don’t turn it on minimum... never in the heat, not a single air conditioner will give you 16-17 degrees!!! You’ll stupidly ruin it!) and enjoy the coolness!

... I'll tell you about the outdoor unit later! I would like to inform you that I have been involved in air conditioning and ventilation since 2000 and am ready to help with advice and business in this area!!! So ask away! I’ll answer later, in the evening I’ll answer everyone, because there’s a lot of work right now... I’m running away) Have a good day everyone!
Do-it-yourself split system cleaning
How to properly remove an air conditioner from a wall with your own hands
disassembled indoor unit. With how to remove the air conditioning compressor itself outdoor unit with your own hands... Remove the protective cover from the body; ...
There are situations when it is necessary to dismantle the air conditioner. The reasons can be completely different - the old split system does not work, you may be moving, or you are planning to renovate the room. This problem can be solved by calling a specialist from service center. But if you want to save money, have some skills and desire, then you can cope with this task yourself. We will tell you below in our article how to remove the air conditioner from the wall during renovation, while avoiding negative nuances and mistakes, and how to hang wallpaper underneath it.
How to wallpaper under an air conditioner?
This is quite difficult task. There are people for whom “it will be fine as is,” and there are others who want to do everything perfectly.
There are two ways to hang wallpaper:
- Carefully apply new wallpaper, sliding a couple of centimeters under the device. This method will not bring the desired result, since it will be noticeable to the naked eye that the wallpaper is not completely glued under the air conditioner.
- Remove the air conditioner for a while and stick the wallpaper perfectly.
How to remove an air conditioner from a wall during repairs so that you are pleased with the end result - we will consider in detail below.
Precautionary measures
Before you figure out how to remove the air conditioner from the wall with your own hands, you need to understand how it works in order to avoid unpleasant consequences. This device consists of 2 blocks - external and internal. Two lines connect them, and the refrigerant moves through them. Freon in a liquid state circulates through a tube of smaller diameter from the indoor to the outdoor unit, and it runs in the opposite direction, but in a gaseous state through a thicker copper tube.
This part contains problems that can ruin all your actions when trying to remove the air conditioner with your own hands:
- Complete or partial loss of freon can occur if you disconnect the main pipelines incorrectly.
- Air that contains moisture may enter the heat exchanger and tubes, which can lead to breakdown when the air conditioner operates after reconnection. Incompressible moisture enters the compressor and damages the device.
- Entry of small particles into copper pipes pulling them out very quickly leads to system breakdown.
- Handle the threaded fittings that are soldered to the tubes very carefully. If they are damaged, expensive repairs will be required.
- Be sure to mark the terminals so that you can easily reconnect the air conditioner without mixing up the wires.
- Don't cut it too short drainage tube, through which condensate is discharged outside the outdoor unit.
Important! Read the instructions carefully before starting to dismantle the air conditioner so that it does not need to be repaired in the future.
Preparatory stage
It is necessary to prepare a number of tools, without which it is impossible to cope with the task, before answering the question of how to remove the air conditioner from the wall during a DIY repair.
Required tools:
- Pipe cutter.
- Gauge manifold.
- Hex socket wrenches.
- Open-end wrenches.
- Side cutters.
- Adjustable wrenches.
- Drill.
- Phillips screwdriver.
- Construction knife.
There are times when you need to acquire safety equipment.
Important! When removing the device, two people must be involved in order to carry out the work without risk to life and health.
Freon release
There are three options for dismantling the air conditioner yourself:
- Disassembly with freon release.
- Preservation of gas inside the device.
- Using a special technique, with the help of professional equipment, save freon completely.
All methods are used, but the third gives the most best effect without any loss.
To remove the air conditioner from the wall with your own hands correctly, you need to study the design of the split system, which consists of a closed circuit filled with freon. It consists of the following components - a compressor, a system of copper tubes and an evaporator with a condenser, which connects the entire system and ensures the selection and supply of refrigerant.
To turn off the air conditioner without losing freon, you need to pump it into the condenser yourself, for this:
- Close the valve between the device and the thin-diameter tube while the equipment is operating in cooling mode.
- After a minute, when all the refrigerant has been pumped into the condenser, close the valve on the thick tube. With this action you will turn off the freon supply and “close” it in the trap.
Dismantling with video
To dismantle the external unit, you need to disconnect copper tubes. To do this, they need to be cut at a distance of about 20 cm from the fitting, and then the sections must be caulked to ensure complete sealing.
Important! Copper tubing cannot be reused because extension is strictly prohibited.
Outdoor unit
Remove thermal insulation after working with copper pipes. It is best when two people work: one outside the room, and the second inside. Removing the device in this way is faster:
- One turns off the power, and the second disconnects the wires, having previously marked the terminals at the place where they are connected.
Important! You have to manually straighten the tubes so that they fit through the holes in the wall without any problems.
- The end of the cable is also screwed to them, which is dragged inside the room.
- Then the nuts that hold the outdoor unit on special brackets are unscrewed.
- Then the two of you remove the block and move it inside the room.
Important! The outdoor unit that you have removed must be stored exclusively vertically.
Indoor unit
How to disassemble the indoor unit so that freon does not leak out? Dismantling the internal unit of the device has some nuances, without knowledge of which you will not be able to do all the work correctly, which can lead to breakage of delicate fasteners.
Here's how to remove the indoor air conditioner unit from the wall for wallpapering correctly:
- Remove the housing cover using the indicators located on the bottom of the unit.
Important! Each manufacturer installs the lid differently. Read the instructions carefully to understand how to do it correctly.
- Disconnect electrical cable, to do this, unscrew it from the terminals and carefully pull it out of the system.
- Disconnect the pipe and place a container first, because water may leak out of it.
- Remove the heat insulator and then disconnect freon pipeline. Carefully unscrew the tubes, as you did when removing the outdoor unit, screw them on with caps or wrap them with electrical tape.
Important! You can also cut the tubes, squeeze them and then twist them. The main task is to prevent the entry of polluting components into them.
If you notice that cold air the air coming out of the split system has an unpleasant sweetish smell of rot - this means that the unit urgently needs preventative cleaning
Except unpleasant odor, clogging of the internal components of the air conditioner leads to faster wear of the power system of the device, increased energy consumption and, most unpleasantly, can cause a number of allergic respiratory diseases.
Of course, you can have a service technician perform this procedure, especially if the air conditioner is still running. warranty service. But if you have been using a split system for a long time and do not intend to pay a lot of money for something that you can easily handle on your own, then you should know the procedure for disassembling the air conditioner for its preventative cleaning.
In fact, today there are quite a lot of companies producing split systems, but they all assume a more or less unified system for constructing indoor units. So even if you encounter some design differences, the basic disassembly technique will remain the same.
How to disassemble the indoor unit of a split system for maintenance
The first step is to prepare a set of screwdrivers of various sizes and work area configurations. Also, do not forget to put boxes next to you for collecting fasteners, as well as a functional and electrical diagram of the air conditioner (in some models electrical diagram applied to inner side top cover of the unit). For the cleaning internal elements Split systems will need a vacuum cleaner, detergents and clean rags.
- Turn off the power to the air conditioner . This is the first thing to do in order to comply with electrical safety rules. Do not turn off the air conditioner using the remote control button, but simply remove the plug from the socket.
- Remove the top cover of the unit . Unscrew several bolts (two or three) covered with decorative plugs and remove the top cover of the indoor unit of the air conditioner. The lid, which is coated on the inside with a layer of dirt and mold, should be washed in the bathroom using a brush and detergent.
- Remove air filters . Remove plastic filters rough air purification. They can be mounted both on the block cover and inside it. We also wash the filters under a strong stream of water, helping ourselves with a brush.
- Remove the guides air flow . Bending slightly, remove the special blinds from the grooves that direct the flow of cold air into the room. They, too, most likely need intensive washing.
- Disconnect the bottom cover of the indoor unit, drain pipe and power cord of the split system . Carefully press out the three latches, and then disconnect the drain pan along with the outlet hose from the internal block of the split system.
- Disconnect terminal blocks electrical wiring, remove the electronic control unit and transformer . To remove the control unit from the split system, carefully press out the side fasteners and then pull the device towards you. Don't forget to unscrew the ground wires before doing this.
- Remove the fan motor. We unscrew the bolts securing the electric motor to the chassis, lift the evaporator and remove the motor together with the rotary fan.
- Separate the motor from the fan . First, you will have to carefully heat the head of the bolt with a soldering iron to unlock the thermal lock on the engine pulley. Once the fan blades are removed from the pulley, they can be thoroughly washed in the bathtub.
Assembling the indoor unit of the split system should be done in the reverse order.
Regular maintenance of the air conditioner requires disassembling its internal and external units. This is necessary when replacing parts of the split system and completely cleaning it. It is worth understanding the features of the process and the consequences of incorrect disassembly.
How to remove the indoor unit
To remove the indoor unit of any type of air conditioner, you need to unclip the lower clips. For most devices, they are located at the bottom and are indicated by arrows or serifs. Types of clips:
- The hook to the wall plate is made from above. In these cases, the clips are pressed upward.
- Bottom hook on the plate. In such devices there are additional holes at the bottom. The fasteners are pulled down from the block.
- Clips located under the decorative cover. First remove the cover and then press out the fasteners.
The removed internal air conditioner module is easier to disassemble.
Disassembling the indoor unit of the air conditioner
You can disassemble the internal unit of the split system after disconnecting the device from the network. Then open the housing cover and take out the filters. The next step is to remove the housing:
- Any air conditioner has screws on the bottom that are easy to find under the plugs. They need to be unscrewed.
- There may also be screws or latches under the cover behind which the filters are located. After unscrewing them you can open them slightly bottom element housings.
- The next task is to release the latches located on the top of the case. They are quite rigid; to disconnect them you need to know the fastening features. Most often, they can be unlocked by pulling the bottom of the case toward you and up.
- All that remains is to disconnect all the wires, if any.
- Unscrew and release left side radiator from the device body.
- Unscrew the fastening on the right in the shaft itself a few turns. This screw is often over-tightened, so it is important to be careful not to damage the head of the fastener or break the blades.
- Remove the shaft from the bottom of the housing, ensuring the safety of the parts. Since the fan is often installed quite tightly, to remove it you need great experience. The screw can be held with a screwdriver while pushing the shaft.
- Remove the control unit from the housing. This will require disconnecting all wires and sensors. Then disconnect the latches and unscrew the screws securing the control unit.
- Unscrew all motor mounts. Disconnect the casing with the shaft.
- Carefully study how the shaft is disconnected from the motor. Carefully bend the copper tubes leading to the radiator.
Having opened the blinds slightly, it is easy to remove the body by pulling it towards you.
The next step is to remove the drainage container. Some models are made monolithic, so it is impossible to separate the tray from the body. It is important to understand the features of its installation in order to install it correctly during assembly.
It is recommended to prepare a container for condensation from the tray. To disassemble the container, simply unscrew one screw and then disconnect the clips at the bottom. The blind motor must be disconnected from the tray. After removing the container, separate the “tail” of the drainage hose.

Air conditioner indoor unit fan (impeller)
The next task is to remove the fan (shaft). This procedure is the most responsible and complex. A simple option for removing the shaft is applicable when it is removed to the left without affecting the control unit and engine:
When installing the shaft into the device body, the screw must be exactly in its original position. Otherwise the fan will touch the walls.
There is also a more complex option for removing the fan. If the shaft is pulled out from right side, you will have to remove the electric motor and control unit.
Sequencing:
Disassembling the external module
Dismantling a mobile or window air conditioner does not take much time - just remove the device from the window or remove the air duct. When disassembling a full-fledged split system, it is necessary to preserve all the refrigerant.
 The connecting tubes through which freon is transported have different diameters. A thin channel serves to transport liquid refrigerant. The large tube is designed to pump freon gas. When disassembling the air conditioner, it is necessary to “drive” the refrigerant into the outdoor module. Then you can turn off the main channels. To pump the refrigerant, while the device is running, it is necessary to screw in the pipe with liquid freon, which flows from the outdoor unit into the room. The device will pump the gaseous substance into the outdoor unit in 1 minute. After this, you should immediately turn off the device.
It takes two people to disassemble the outdoor unit of the air conditioner. This way you can eliminate unnecessary risk and reduce work time.
After disconnecting the device from the power supply, disconnect the cables by marking the terminals.
The copper ducts that carry the refrigerant can be straightened yourself with care. Along with them, the electrical cable is removed into the room. It is screwed to the end of the tube. Then you need to unscrew the nuts that hold the outdoor module. It takes two people to remove the block. Lastly, the brackets are removed from the wall.
The removed outdoor unit requires vertical storage and transportation. To avoid possible damage, it is placed in a box with foam plastic.
Removing the compressor
In some cases, only dismantling the outdoor unit is required, for example, when it is necessary to adjust the operation of the compressor. In this case, the indoor unit remains in place. The main task is to remove the compressor correctly:
- remove the cover of the outdoor unit;
- disconnect the discharge and suction pipes;
- disconnect the electrical wires;
- unscrew the fastening elements of the fan and condenser;
- remove the capacitor from the housing;
- dismantle the compressor mounts and the part itself.
By performing this sequence of actions, you can reduce the risk of damage to pipelines and gain access to other elements located in the housing.
Consequences of improper dismantling
 If dismantled incorrectly, it is easy to damage the air conditioner. Possible unpleasant consequences.
Dismantling a split system consisting of an outdoor and indoor unit is more difficult than a monoblock air conditioner. The main nuance is the closed circuit of refrigerant circulation, which must be depressurized when removed.
Is it advisable to do this kind of work yourself or is it better to entrust it to professionals? What is the technology for dismantling an air conditioner? The answers to these questions are described in the article.
Dismantling the split system: the pros and cons of removing the air conditioner yourself
As a rule, the main reason for removing an air conditioner is moving or replacing an obsolete device with a new one. When changing your place of residence or office, you don’t want to leave the new owners with a split system purchased at their own expense. In this case, you can invite a team of specialists to dismantle the air conditioner or try to do this work yourself.

Professional installers will dismantle air conditioners (split systems) in 15 minutes, but you will have to pay for such speed and a guarantee that the device will not fail. The pricing policy depends on the power of the equipment: removing an apartment air conditioner will cost 2500-4000 rubles, a large office split system will cost up to 10,000 rubles. The cost of dismantling the built-in suspended ceiling or cassette “conder” increases by 5-15%.
Basically, a person who is familiar with the technical topic and common device air conditioner, it will be more or less clear how to unscrew the fittings, pump out the refrigerant, disconnect the communications, remove the split system units and pack the elements in boxes. However, not all so simple. There are some risks you need to be aware of:

Important! No one can give a 100% guarantee that the air conditioner will continue to operate uninterruptedly after it has been dismantled. The risk of dismantling/installing a split system in unusable condition is quite high.
If the above reasons are not enough and the desire to remove the device yourself has not disappeared, then you need to familiarize yourself with the design of the air conditioner and understand the technology for dismantling it.
Air conditioner device
50% of the success of its removal depends on understanding the operation of the split system. A modern split system consists of outdoor and indoor units, each of which contains a set of appropriate equipment and performs its own function.
The outdoor unit includes the following components:
- heat exchanger - condenser;
- a fan that drives air through the heat exchanger;
- a compressor that builds up pressure;
- dryer, connecting copper pipes and expansion valve;
- electrical elements (powered from the mains) and automation equipment.
The indoor unit of the air conditioner contains:
- heat exchanger - evaporator with fan;
- blinds that direct air flow;
- filter elements;
- container for collecting condensate.

The blocks are connected to each other by two coolant lines. The coolant moves through a large pipe in the form of a gas, and through a pipe with a smaller diameter - in a liquid state.
General operating principle of air conditioners: The compressor works with freon vapor. When turned on, the refrigerant vapor heats up and enters the outdoor unit, where it transfers heat to the radiator. The refrigerant then returns to the indoor unit, absorbs heat from the house, heats up and transfers the heat to the radiator. Thus, cyclical work occurs.
Important! The greatest danger of deformation during dismantling is Vacuum pump compressor. Even minor damage to the pump reduces the performance of the split system - dust, scratches, foreign objects and dirt can cause a decrease in the performance of the air conditioner.
Do-it-yourself dismantling of the split system: sequence of actions
Required Tools
When servicing the split system and dismantling it, it is important to follow basic safety rules: work with an assistant and use safety equipment.

To remove an apartment air conditioner, you need to stock up on the following tools:
- open-end wrenches;
- adjustable wrenches;
- socket wrenches with ratchet;
- screwdriver PH2;
- side cutters;
- construction knife;
- set of hexagons;
- screwdriver;
- pipe cutter;
- manifold.
Refrigerant Removal
Before removing the air conditioner, it is necessary to “distill” the refrigerant:
- Turn on the air conditioner in cooling mode and set the remote control to the lowest temperature setting.
- Find two valves on the external unit of the split system different sizes and use an adjustable wrench to unscrew the plugs.
- After starting the compressor, turn off the smaller valve using the hexagon. Immediately connect the pressure gauge manifold to the larger valve.
- Monitor the pressure drop on a monometer. As soon as the arrow drops below zero, tighten the large valve.

After completing these steps, turn off the air conditioner - now all the refrigerant is discharged to the outdoor unit. The next step is to disconnect the wire from the external unit.
Disconnecting communications
Sequencing:
- Unscrew the smaller tube. As a rule, this process does not cause any difficulties.
- Unscrew the large tube carefully, applying little effort so as not to break the thread.
- After disconnecting the freon line, close the valves with plugs - this will protect external unit air conditioner to prevent moisture and debris from getting inside. If there are no special plugs, you can use regular electrical tape.
- Disconnect electrical communications.

Removing the outdoor and indoor units of the air conditioner
Unscrew the external unit of the split system from the horizontal brackets. Typically, the outer part of the air conditioner is screwed with four M8, M6 or M10 bolts. After the bolts are unscrewed outer casing remove and set aside. Only the freon drain should remain on the outside of the building, which has not yet been removed.
The next step is to dismantle the indoor unit of the split system. To an inexperienced specialist, the removal process from the outside will seem simple: disconnect from the wall and unfasten the tubes. In fact, in order to correctly dismantle this part of the air conditioner, you must follow the recommended procedure:

The old freon line remains on the façade of the building. For further installation of the split system, you will need nuts from the freon duct - they must be unscrewed from the pipe.
Important! During the transportation inner part The air conditioner can be located in any position, and the outdoor unit can only be installed the way it is installed on the brackets, that is, exclusively upside down and feet down.
Features of dismantling different types of air conditioners
The dismantling procedure is given above wall split do-it-yourself systems - in fact, household air conditioner. The situation is more complicated with the removal of a duct split system - the device is very heavy, and its dismantling requires disconnecting the air ducts from the units.
The order of work is as follows:
- Remove the supply and exhaust adapters with grille.
- Disconnect the air ducts from the indoor unit - unscrew the screws or remove the clamps (depending on the air conditioner model).
- Pump freon into the external unit.
- Continue removal according to the described diagram for dismantling the wall-mounted device.

The column split system is removed in the same sequence as the wall-mounted one according to the following diagram:
- Pressure control and freon pumping.
- Disconnecting the connecting lines and removing the external unit.
- Disconnecting the communications of the indoor unit and dismantling it.
The room block does not have a column mounting plate There are no fastening studs (like a console or cassette), so the dismantling process is somewhat simplified.
Removal of the cassette split system occurs according to the duct scheme. Dismantling the internal module begins with loosening the fastening nuts and sequentially disconnecting the communications. The difference from a duct system is that a cassette split system does not have air ducts.
The internal fastening of the console (floor-ceiling) occurs using studs - this point must be taken into account when disconnecting the block from the wall or ceiling. Otherwise, the dismantling process is similar to removing a wall-mounted air conditioner.
Important! It is impossible to dismantle the split system in rainy or snowy weather. Moisture that gets inside will cause the compressor to fail.

- When disconnecting wires or tubes, it is advisable to mark their ends and additionally draw a connection diagram. If reassembly is not carried out immediately after dismantling, then there is a risk of forgetting the order of their fastening.
- Violation of the dismantling rules can lead to pumping out freon. The cost of refrigerant injection and repair of the split system can be more expensive than calling a specialist to professionally remove the air conditioner.
- Transportation of the split system must be carried out with extreme caution. The most susceptible and vulnerable part of the system is the vacuum pump. Repairing or replacing it will be expensive.
- Dismantling the indoor unit is best done with three people. Two hold, one unscrews communications, etc.
- When removing the indoor unit, the most difficult thing to get to is the latches. Often you have to remove the evaporator cover. For lack of special tools, some get out of the situation using a Phillips screwdriver and pliers.
Dismantling the split system: video
")


