Do-it-yourself wooden plinth making. How to properly attach a wooden ceiling plinth. Installing the outer corners of the baseboard
For many years, wood finishing has been considered a true classic, which is not subject to newfangled trends. The modern market offers a huge selection of high-quality floor borders, that’s just natural wood is valued above all else. In this article we will talk about the pros and cons of this material, we will try to figure out how to make a plinth yourself and install it.
Features of modern skirting boards
When choosing such products, first of all you should remember that high-quality wood has never been cheap. Such borders belong to the middle or upper price category. Even if you figure out how to do wooden baseboard with your own hands, you must first take care of making the right choice material. Naturally, wood will cost much more than plastic. Now let's look at what types of skirting boards there are and get acquainted with their advantages and disadvantages.
Types of skirting boards
Today in the store you can find only two versions of products made from natural wood:
- Skirting boards made from solid wood. Their cost largely depends on the type of wood; in addition, the complexity of the profile, level of processing and grade play an important role in determining the price. As a rule, such borders are classified as luxury goods and products of the average price niche.
- Veneer skirting boards. They are made from natural solid wood, less expensive coniferous species, in particular, spruce or pine. There are also models made from laminated veneer lumber. After the front profile has already been formed, the expensive wood veneer is glued to the plank industrially. The result is a product identical to an expensive natural elite solid wood, but it costs much less than the original.
Important! Molded MDF slats, covered natural veneer also apply to wooden products.

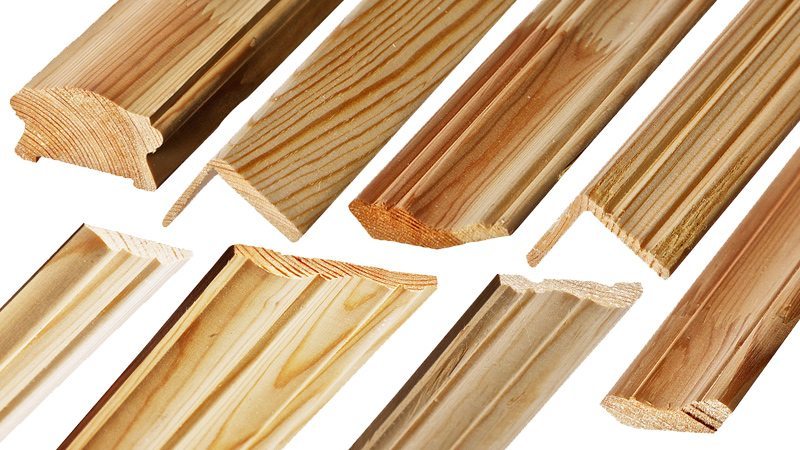
Shapes of skirting boards
Long gone are the days when the production of such products was limited only to models with triangular cuts. They differed only in the absence or presence of a chamfer. Fortunately, the current woodworking market regularly improves equipment and technologies.
According to their form, they are divided into the following models:
- Traditional forms. Modern wooden planks are in no way inferior plaster stucco or polyurethane products according to the complexity of the ornament.
Important! High-tech programmable machines allow you to apply patterns that are as similar as possible to those created by hand carving.
- Running forms. All manufacturers try to somehow stand out from the crowd with their unique models. Therefore, there are classic standard products on sale, the main bar of which has a size from 10 to 25 mm, and models with non-standard heights from 40 to 300 mm.
Important! Choosing optimal size baseboards, try to build on the height of the ceiling:
- In city apartments, the ceiling has a standard height of 2.7 m, so the height of the bar in such cases should not exceed 7 cm.
- For higher ceilings, it is better to buy borders no lower than 5 cm.
What material is the plinth made from?
Previously, people chose a plinth based solely on the material it was made of. But modern designers They successfully combine different tree species, so they easily bypass already established rules. Before making a plinth, familiarize yourself with its varieties depending on the material:
- Pine. This type of conifer is considered the most popular because it is quite easy to work with. The array itself is very soft, easy to cut and process. The variety of colors and textures allows you to use a variety of tinting compositions to achieve an original design solution.
- Larch. Borders made of this material occupy a separate niche in the modern market. It is not cheap, but it is not at all afraid of moisture, due to which it does not rot. Larch borders are ideal for a shower room or kitchen.
- Oak. It is classified as an elite solid wood because it is characterized by unique durability and strength. But this material is valued more for its aesthetic qualities.
Important! Models made from bleached, stained or artificially aged oak are usually used to give the interior solidity.
- Beech. It also belongs to the varieties of elite wood, because its characteristics are in no way inferior to the aforementioned oak. In its pure form, it has an original pink tint and a perfectly smooth texture.
- Nut. Such borders are distinguished by a noble brown shade. Walnut strips are elastic, mainly used for making bent profiles.
Important! Due to the high iodine content, the nut also has certain health properties.
- Ash. This material has a charming light olive hue. Like a walnut, it bends well, its texture is a bit like oak, but the fibers are more clearly defined in it.
- Alder. It can be processed, but bends quite difficult. Such planks are afraid of water; even temporary dampness can lead to damage and rotting of the border.
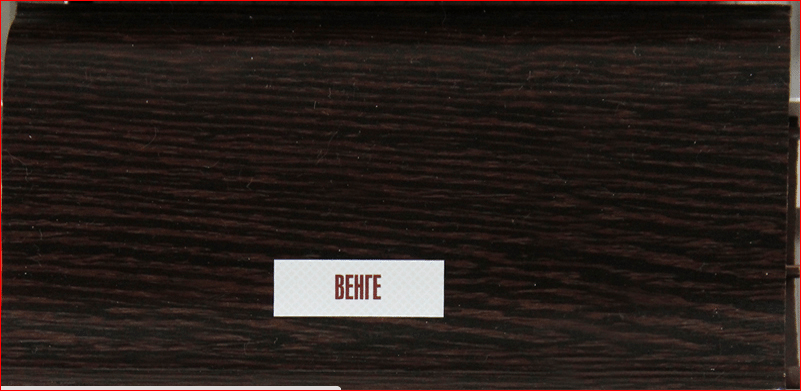
- Exotic mahogany and wenge. They are mainly preferred because of their original texture and color. The array itself is very light and durable, but not everyone can afford it financially.
- Linden and aspen. The materials are flexible, resistant to moisture, and easy to process. They are relatively inexpensive, which is why they are used, in particular, to decorate bathhouses.
- Cherry. Such borders are in deserved demand. They are not as strong as oak, but are more resistant to rot and elastic. If you choose such a thin baseboard, keep in mind that it will change color over time.
Important! When buying a clean border that is not varnished, remember that after you varnish it, it will greatly change its shade. If you want to find out how it will turn out as a result of varnishing, then wipe the bar with a wet sponge.
The nuances of self-installation of skirting boards
Despite the fact that wooden products are much tougher compared to their plastic “counterparts,” even a beginner can figure out how to make a wooden plinth with their own hands. Guide self-installation does not cause any difficulties, especially if you have at least once worked with a drill and screwdriver.
Selection of material and preparation for installation
Many people wonder whether it is possible to make wooden borders on their own, but the main thing in this matter is not to forget that their manufacture is not always economically profitable.
Important! All financial and labor costs will pay off only if you choose the right board.
Remember:
- The moisture level of the material should not be lower than 16%. Raw wood cannot be sanded; moreover, it cannot be processed on a milling machine.
- Rot, various chips, knots, and other defects are undesirable here.
- The ideal option is a dry, clean, planed board.
Important! The main type of processing at this stage of material preparation is milling. To do this you will need milling machine or a high-quality hand router with stops and clamps.

Installation of wooden plinth
Instructions for installing natural wood products are as follows:
- Use a tape measure to determine how many slats you will need, then add 20% to that figure. This tolerance is necessary for trimming and joining.
- Start arranging from the door opening or the near corner. Move clockwise.
Important! Remember that wood is not plastic, there are no adapters or plugs, so in this situation, proper joining of the planks in a straight line and trimming the corners is especially important.
- If the corners in the room are perfectly straight, then use a miter box to cut the planks at an angle of 45 degrees and join them. Since this situation rarely occurs, it is better to use a flat plinth for marking, apply it alternately to both sides of each corner, then draw lines along the upper and lower edges of the plank. Cutting angle line is the intersection of these lines.
- Installation is carried out using self-tapping screws. To secure the slats with them, simply make them through holes. Or fix them on the wall with clips, then install the plinth on top.
Video material
From this article you learned how to make a wooden plinth with your own hands, so don’t hesitate, choose quality material and get to work. Natural wooden borders, as you know, are preferred by people with refined, well-developed taste. But, nevertheless, installing them is not difficult, as you can see by reading this material.
Hello to all DIY lovers!
This summer we had to do quite a lot of renovations.
And it all started with the fact that we wanted to replace the old wooden windows to plastic ones. However, since our house is wooden and quite old, when dismantling the old windows it turned out that some of the wall logs (especially the logs located under the window sills) were quite rotten. As a result, in addition to installing new windows, we first had to replace almost half the wall.
Naturally, the repairs took a significant amount of time (even now they have not yet completed it), and, in addition, we had to spend significantly more money than planned for repairs in advance.
In this regard, in the last stages of the renovation, we had to save a lot, mainly, of course, on what we could not buy, but do it ourselves.
As a result, when it came to the plinth, we also decided not to buy a ready-made one, but to make it ourselves from ordinary spruce and pine boards.
Moreover, special requirements We didn’t pay much attention to the beauty of the baseboard, since the floor in our house is also quite old and perhaps in a few years it will still need to be replaced.
Since the plinth had to be made from boards, it turned out to be somewhat narrow, although, in general, this width turned out to be quite enough. In terms of height, I decided to make it larger, 50-60 centimeters, in order to make it more convenient to attach to the walls.
In order for the plinth to adhere well to the floor (which has some uneven spots here and there), I made the bottom edge of the plinth beveled back at an angle of 10 degrees. This way it will fit tightly to the wall (this will be the base surface) and at the same time to the floor, the unevenness of which will not be scary.
Below is a drawing of this plinth with dimensions.
In order to make this skirting board, I needed about two and a bit hours of evening time, as well as the following supplies.
Materials:
The boards are 2.5 cm thick, 12 cm wide, and 200 cm long.
Tools:
Circular saw for wood;
Electric planer;
Manual frezer;
Belt surface grinder;
Guide ruler for circular saw;
Wood cutter for hand router and wrench to install it;
Protective glasses.

First, we install a guide ruler on the circular saw and set the width of the plinth blanks to be cut on it. I set the width to 58mm, taking into account an allowance of approximately 3mm for the cut.

Then we set the inclination of the circular saw to 10 degrees.

Now we do the sawing.
Our blanks have already been planed.

Now we process the upper front edges of the workpieces manual router with a figured cutter installed on it.

This operation must be performed with safety glasses, since when the router is running, chips fly in all directions, as well as small pieces of wood that can easily get into your eyes.
After this we perform the final - finishing workpieces with a grinding machine.
All photos from the article
Wood finish It is deservedly considered a classic, not subject to any newfangled trends. On modern market Nowadays there are many good floor borders, but natural wood, like a hundred years ago, is valued higher. In this article we will talk about the advantages and disadvantages of this material, and also tell you how to correctly select and install a wooden plinth with your own hands.
What you need to know about wooden skirting boards
Advice: when choosing such products, you should remember that today high-quality wood cannot be cheap.
These curbs belong to the upper or, at most, middle price category.
Even if you decide to make wooden skirting boards with your own hands, they will cost more than budget plastic.
Types of products
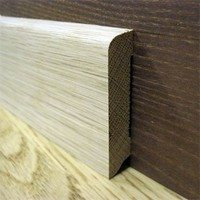
At the moment, the market offers two types of products made from natural wood: this is a border cut from solid massif and veneered version.

- Solid wood plinth is a classic. The cost of such planks depends, first of all, on the type of wood, as well as on the complexity of the profile, grade and level of processing. Such borders can be located both among elite goods and in the middle price niche;
- The basis of the veneered border is a natural array of inexpensive conifers, usually pine or spruce. In some models, glued laminated timber is used as a basis. After forming the front profile, a veneer of more than 300 mm is glued onto the plank using an industrial method. As a result, the output we have is a product absolutely identical to an elite natural solid, but the price of this plinth is an order of magnitude lower than the original.

Important: in part, wooden products include planks made from pressed MDF and covered with natural veneer.
Most often they are used for arrangement.
Product form
Gone are the days when the entire range of such products was limited to a few models with a triangular cut. And these skirting boards differed only in the presence or absence of a chamfer. The modern woodworking market is constantly improving technology and equipment.

Nowadays, wooden planks are practically on par with polyurethane products or gypsum stucco in terms of the complexity of their ornaments. The patterns that programmable CNC machines can create can only be compared to hand-carved wood.

Each manufacturer is now trying to stand out with its unique models. Of course, there is a standard classic line of products, in which the size of the base of the bar ranges from 10 to 25 mm. As for the height, there are no restrictions; it starts from 40 mm and in some models can reach up to 300 mm.
Important: when choosing a size, they are often based on the height of the ceiling.
For a city apartment with a standard ceiling of around 2.7 m, the height of the plank should not exceed 70 mm.
For ceilings up to 3 m, planks of 70 - 90 mm are suitable; for higher ceilings, a plinth of at least 50 mm is taken; there is no upper limit here.
What kind of wood is the plinth made of?
It has always been believed that the baseboard should be selected based on the material from which the floor is made.
But modern design trends make it possible to successfully combine different breeds and bypass old dogmas.
- Among coniferous species, pine is undoubtedly considered the most popular. It is a pleasure to work with this material. The soft massif is well cut and processed. The texture and color allow the use of a variety of tinting compositions, achieving an original design solution. Spruce is less often used in production, since this solid wood is considered less elastic;

- A separate niche is occupied by larch borders. The price of such an array is quite high, but larch is not afraid of moisture, and most importantly, it is not susceptible to rotting. These skirting boards are great for areas such as the kitchen or shower room;
- Oak is traditionally considered an elite wood. It has unique strength and durability. But it is valued not only for this; the aesthetic qualities of oak are deservedly considered one of the highest. Skirting boards made of stained, bleached or artificially aged oak will emphasize the solidity of the interior;
- Beech also belongs to the elite varieties; its characteristics are practically not inferior to oak. But in its pure form it has an original pink tint and smooth texture;

- Walnut borders have a noble Brown color. These strips have good elasticity and are often used for the production of bent profiles. The high iodine content gives the nut health properties and makes it resistant to rotting;
- Ash has a beautiful light olive color. Like walnut, it bends well, its texture is vaguely reminiscent of oak, but with more clearly defined fibers;

- Alder is quite pliable when processed, but the planks practically do not bend. In addition, this array is afraid of any moisture; even light, temporary dampness can lead to rotting and damage to the border;
- People choose exotic wenge and mahogany because of their original color and texture. The array itself is quite durable and lightweight, but not everyone can afford such a plinth;
- Aspen and linden are quite resistant to moisture, flexible and easy to process. They are relatively inexpensive, so these rocks are often used to decorate bathhouses and other similar premises;
- Cherry is also quite popular. It is certainly not as strong as oak, but it is more elastic and resistant to rotting. When choosing such a plinth, you should take into account the fact that cherry changes color over time.

Tip: When you buy an unvarnished, clean border, do not forget that after varnishing it will seriously change its shade.
To find out what awaits you at the finish line, you need to wipe the bar with a wet sponge.
But this only works for clear varnishes.
Installation subtleties
Although wooden planks are much tougher compared to their plastic counterparts, the instructions for self-installation Even elite plinths, as a rule, do not cause difficulties for people who are well familiar with a hacksaw screwdriver and a drill. Moreover, some craftsmen make borders with their own hands.
Is it possible to make a border yourself?
Many people ask the question of how to make a plinth from wood with their own hands. But here it should be remembered that self-production curbs are not always economically viable.
First, you need to choose the right board. The forest humidity level should not exceed 16%.
Raw wood cannot be sanded well, plus it is difficult to mill. Knots, rot, chips and other defects are also undesirable. Ideally, you need a clean, dry, planed board.
As you know, the final touch in a renovation is installing a plinth on the floor. It's a simple matter, but very responsible. After all, the first thing that catches your eye is the covering on the floor, and, accordingly, the baseboards installed on it. Except flawless appearance It is very important to ensure a reliable, strong fastening. Since the baseboard on the floor is often touched by feet, the brush of a vacuum cleaner, or even moving furniture.
After finishing the floor, the final stage is the installation of floor skirting boards. It is important that the floor and baseboards match the color scheme.
Particular attention should be paid to securing the outer corners. How to make skirting boards on the floor correctly? First you need to stock up on the following tools:
- drill;
- screwdriver (can be replaced with a screwdriver);
- diamond drills;
- roulette;
- hammer;
- hacksaw (miter saw);
- ruler;
- simple pencil.

Skirting boards on the floor must be installed correctly, otherwise, no matter how ideal your floor covering is, its appearance will be ruined. Since it is necessary to install skirting boards on the floor after all finishing works, it is considered to be a decorative element. For its production are used different materials, for example wood, MDF, metal, plastic, stone or ceramics.
As a rule, floor planks are chosen based on the interior design, as well as in accordance with floor covering premises. Wooden and metal skirting boards in currently Few people install it. The thing is that the price of products made from these materials is quite high. In addition, to make decorative strips from metal or wood, you need ideal Smooth surface. Since they are not flexible, any unevenness on the wall will be reflected in a fairly noticeable gap between the plank and the wall.

MDF skirting boards are very fragile, so it is not advisable to install them in high-traffic areas.
It is impractical to make skirting boards for MDF floors, since this material is considered very fragile. A baseboard on the floor made of ceramic or stone is suitable for the corresponding coatings, but not for parquet or, for example, laminate.
Today, the most popular among the above skirting boards is plastic. The reason for this popularity is a large number of its advantages. First of all, this low price plastic skirting board. But at the same time, it is distinguished by simpler installation, flexibility, water resistance, durability, and it also has special channels for electric cable. Moreover, construction market presents a wide range of colors of plastic decorative floor strips.
How to install a plinth and where to start

First of all, you need to calculate required quantity baseboards. Standard length slats - 2.5 m. Therefore, the perimeter of your room is divided by the length of the material. As you understand, such work requires constant movement from place to place. That is why, to make it as convenient as possible to make skirting boards for the floor, put everything you need in a box and move it along the floor with you. What exactly is needed to install skirting boards on the floor? You will need fittings, fasteners, as well as all of the above tools.
Cutting out the baseboards for the floor
Installation of the plinth on the floor usually begins from doors or corners. You should start by attaching the first two parts of the fittings to pre-marked places. Insert the end of the plinth into one of the elements, and make a mark on the second. At the same time, do not forget that 5 mm of the slats will go into the plug.

First of all, install those planks on the floor that do not require trimming.
Try to foresee in advance that the joints will be in places that are not particularly noticeable or will be covered by furniture.
Drilling holes in walls to install skirting boards
It is not for nothing that many believe that this stage of work is the most critical. After all, if you make a mistake in the height of the holes, the installed plinth will have to be removed as a result. If your walls are perfectly smooth, you should leave a distance of 50 cm between the holes. For fastening the plastic type, 6 x 30 mm dowels or 3.5 x 25 mm screws are suitable. Drilled required amount holes, do not be lazy to vacuum the floors in the room.
How to make skirting boards if the wall is made of plasterboard

Height metal profile for drywall approximately 30 - 50 mm. When installing skirting boards, you often have to deal with a situation where the fastening of the slats bumps into the profile. In this situation, the dowels should be replaced with self-tapping screws. But first you will need to drill the frame with a drill or use special dowels with drills designed for similar situations. By using an awl, you can avoid a collision with the profile. To do this, just pierce the drywall with it.
Do-it-yourself floor plinth installation

Make holes on the slats for self-tapping screws using an awl.
Many craftsmen advise first of all to make holes in the baseboards, along which to subsequently drill the surface on the wall. But, as practice shows, this installation method leaves gaps between the floor and the baseboard. In addition, if over time you want to change, for example, the floor covering, dismantling the slats will be quite difficult.
In order to perfectly install the bar without leaving any gaps, you can use the following method, which few people know. The holes on the slats for the screws should be pierced with an awl. By avoiding drilling, you will ensure that the edges of the hole are as tight as possible. An awl can be made from old screwdriver, sharpening its blade to a triangular point.
To avoid making a mistake with the location for the hole in the baseboard, place it against the surface of the wall so that the dowel is visible. Make a mark exactly along the line where it is located at the place under which the cable channel is located. Then insert the self-tapping screw through the already prepared hole into the dowel and tighten it. This method of installing the plinth ensures a strong and reliable fastening, and also leaves a minimum of gaps.
It is very important that the outer corners on the baseboards are secured as tightly as possible, since they are the most likely to be touched. When installing them, be careful, because often drilling a hole for a dowel ends with a chipped corner. In conclusion, it remains to install special plugs for cable channel, and your floors will sparkle with completely new colors.


")